Using the headset
This page will show you the basics of using your headset and running applications.
Starting a SteamVR application
Powering the headset on and off
Preparing your environment
Before you use the headset in a new environment, we recommend you take a moment to prepare your surroundings. This will help you get the best experience when using the headset.
Always clear the room of any obstacles that might get in your way. Also check that you have enough room to move around freely when using the headset. When using the headset, be aware that real-world objects in your environment may be obstructed by virtual ones. Keep in mind the location of the headset cables as you move around.
If possible, cover all reflective surfaces in the room as they may interfere with tracking.
Make sure that your room has good, even lighting when you set up and use the headset. Lighting is particularly important to get the optimal performance from the mixed reality cameras on your headset when using mixed reality features and chroma key especially.
For best results with Varjo inside-out tracking, it helps to have clearly detectable and stationary features in your environment for the headset cameras to follow. Variable textures and clear contrasts such as furniture, paintings, and posters help with Varjo inside-out tracking. Moving objects, blank walls, or smoothly changing color gradients may hinder tracking.
If you have an issue with tracking quality when using Varjo inside-out tracking, we recommend turning off your physical monitors. Tracking may start drifting if there is moving content on a monitor in your field-of-view.
Starting a VR application
To start a VR application in your headset, simply run the application on your Windows computer. The application will open directly in your headset.
Make sure that your VR application is compatible with Varjo headsets. For instructions on how to migrate your existing applications to Varjo headsets, visit our Developer portal.
Starting a SteamVR application
To start a SteamVR application or game, launch it either in Steam or using its own application executable. Do not start SteamVR manually, it will start automatically.
XR-4
To use SteamVR (OpenVR) applications, you need to install SteamVR on your computer. SteamVR (OpenVR) applications can also be used with Varjo inside-out tracking.
XR-3
To use SteamVR (OpenVR) applications, you will need to set up SteamVR™ Tracking for your headset.
Quitting a VR application
To close a VR application running in your headset, you can close the application from the Menu or directly on your Windows computer.
Powering the headset on and off
XR-4
Your headset needs to be connected to the power outlet using the Headset adapter and the 3-port charger.
To turn your headset on and off, press the power button briefly.
To restart your headset, press and hold the power button.
The headset will go idle when you are not using it. The headset displays are turned off and the status indicator light shows a dim green pulsing pattern.
Your headset is automatically activated when you move it. The displays are turned on and the status indicator light turns a solid green.
XR-3, VR-3, and Aero
Your headset is powered by the power supply units connected to the headset adapter(s). If the power supplies are plugged in, the headset remains powered on even when you turn off your computer. The status indicator light will shine orange.
The headset will go idle when you are not using it. The headset displays are turned off and the status indicator light shows a dim green pulsing pattern.
Your headset is automatically activated when you move it. The displays are turned on and the status indicator light turns a solid green.
After using your headset, disconnect the headset from the power source. For example, using a smart plug or an extension cord with a switch allows for easy access to the device’s power supply.
To restart your headset, press and hold both the Menu button  and Action button
  until the status indicator light blinks once. Alternatively, disconnect and reconnect the power cables to restart.
XR-1 Developer Edition, VR-2 Pro, VR-2, and VR-1
Your headset is powered by the Link Box power supply. If the Link Box is plugged in, your headset will remain powered on even when you turn off your computer.
The headset will go idle when you are not using it. When idle, the headset displays are turned off and the status indicator light blinks white.
Your headset is automatically activated when you move it. The displays are turned on and the status indicator light turns green.
After using your headset, disconnect the headset from the power source. For example, using a smart plug or an extension cord with a switch allows for easy access to the device’s power supply.
To restart your headset, press and hold both the System button and Application button until the status indicator light blinks once. Alternatively, disconnect and reconnect the power cable to restart.
Using touch controls
XR-4

The touch area (1) is located on the front right side of the headset. The functions of gestures are as follows:
| Function | Gesture |
| Use the Menu | Tap with finger (touch briefly and lift finger)
|
| Adjust speaker volume | Swipe forward (left-to-right) with finger to increase volume. Swipe back (right-to-left) with finger to decrease volume. |
Using the headset buttons
XR-3, VR-3, and Aero
There are two buttons and an status indicator light on the right side of your headset.

 The Action button is used to interact with applications. This button can serve different purposes depending on the application.
 The Menu button opens the Menu when you are wearing the headset.
 The status indicator light indicates the status of your headset.
XR-1 Developer Edition, VR-2 Pro, VR-2, and VR-1

There are two buttons on your headset: (1) the System button and (2) the Application button.
Use the System button to open the Menu when wearing the headset.
Use the Application button to interact with applications. This button can serve different purposes depending on the application.
The System button also features an status indicator light to indicate the status of your headset.
Status indicator light patterns
XR-4
The status indicator light is located on the front side of the headset, next to the power button. The light patterns correspond to headset status as follows:
| LED pattern | Headset status |
| Green (solid) | The headset is connected and working normally. |
| Dim green (breathing) | The headset is idle and the displays have been turned off. This happens automatically when the headset is not used for a while. The headset will activate when you move it and the LED light will turn green. |
| White (wave) | The headset is starting up. |
| Green (blinking) | The headset is shutting down. |
| Orange (solid) | The headset cannot connect to Varjo Base. There can be several reasons for this:
|
| Red (rapid breathing) | The headset is not working properly. There can be several reasons for this. Check Varjo Base for error details and instructions to correct the issue. |
| Purple (solid, breathing) | The headset firmware is being updated. |
| Purple (two blinks) | Headset restarted. |
Headset adapter
LB-4
The status indicator light is located on top of the headset adapter. The light patterns correspond to headset adapter status as follows:
| LED pattern | Headset status |
| Green | The headset adapter is connected to the computer and the 60 W port in the 3-port charger. |
| Red | The headset adapter is connected to the computer but not the 60 W port in the 3-port charger. |
| Off | The headset adapter is not connected to the computer. |
XR-3, VR-3, and Aero
The status indicator light is located on the front right side of the headset. The light patterns correspond to headset status as follows:
| LED pattern | Headset status |
| Green (solid) | The headset is working normally. |
| Green (pulsing) | The headset is idle and the displays have been turned off. This happens automatically when the headset is not used for a while. The headset will activate when you move it and the LED light will turn green. |
| White (blinking) | The headset is starting up. |
| Green (blinking) | The headset is shutting down. |
| Orange (solid) | The headset cannot connect to Varjo Base. There can be several reasons for this:
|
| Red (pulsing) | The headset is not working properly. There can be several reasons for this. Check Varjo Base for error details and instructions to correct the issue. |
| Blue (pulsing) | The headset firmware is being updated. |
XR-1 Developer Edition, VR-2 Pro, VR-2, and VR-1
The status indicator light is located on the System button of the headset. The light patterns correspond to headset status as follows:
| LED pattern | Headset status |
| Green (solid) | The headset is working normally. |
| White (blinking) | There are two possibilities:
|
| White (two blinks) | A notification is shown in Varjo Base (and also inside the headset if notifications are enabled). See Varjo Base for details and instructions. |
| Red (blinking) | The headset is not working properly. There can be several reasons for this. Check Varjo Base for error details and instructions to correct the issue. |
| Blue (solid), Blue and white (blinking) | The headset firmware is being updated. The LED is solid blue while the headset is connected to a computer, and blinks blue and white while the firmware update is in progress. |
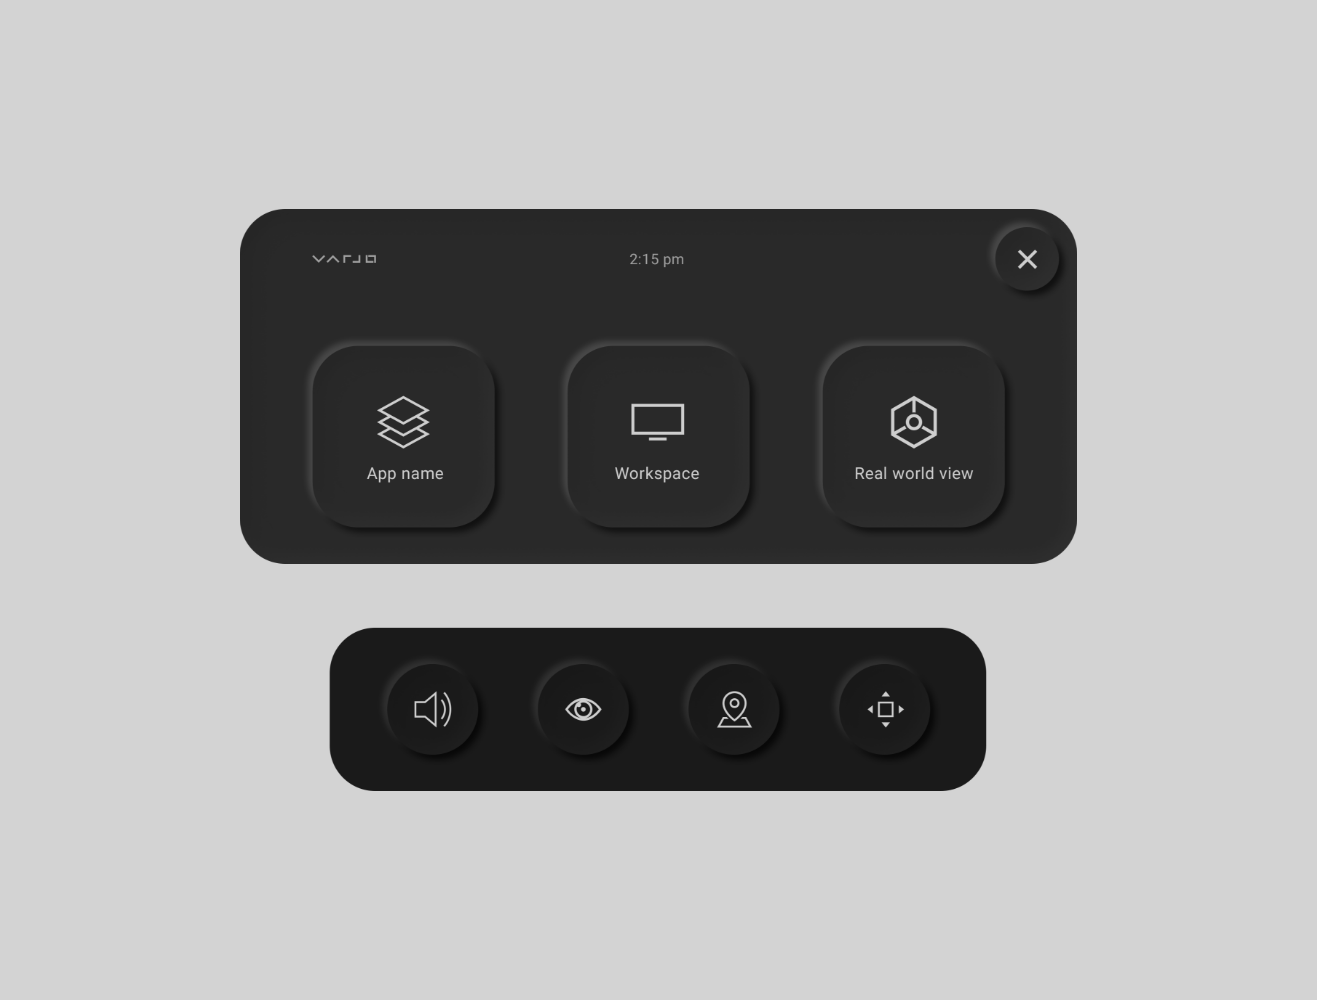
Using the Menu
The Menu contains shortcuts for frequently used features of your headset. You can open the Menu at any time while using the headset. There are a few different ways to use the Menu.
Opening the Menu
XR-4

Press the Menu button in your Varjo Controller, or use the touch controls on your headset to open and close the menu. Alternatively, select Menu button in the Tools menu in Varjo Base.
XR-3, VR-3, and Aero
Press the Menu button to open or close the Menu. Alternatively, select Menu button in the Tools menu in Varjo Base.
XR-1 Developer Edition, VR-2 Pro, VR-2, and VR-1
Press the System button to open or close the Menu. Alternatively, select System button in the Tools menu in Varjo Base.
Using the Menu with controllers
Point with the controller and select using the Trigger button.
Using the Menu with touch controls
XR-4
Point with your head and tap once on the touch area to select.
Using the Menu with headset buttons
XR-3, VR-3, and Aero
Turn your head to focus on a menu item and use the Action button to select. You can also point and select with a controller.
XR-1 Developer Edition, VR-2 Pro, VR-2, and VR-1
Turn your head to focus on a menu item and use the Application button to select. You can also point and select with a controller.
Using the Menu with your hands
XR-3 and VR-3
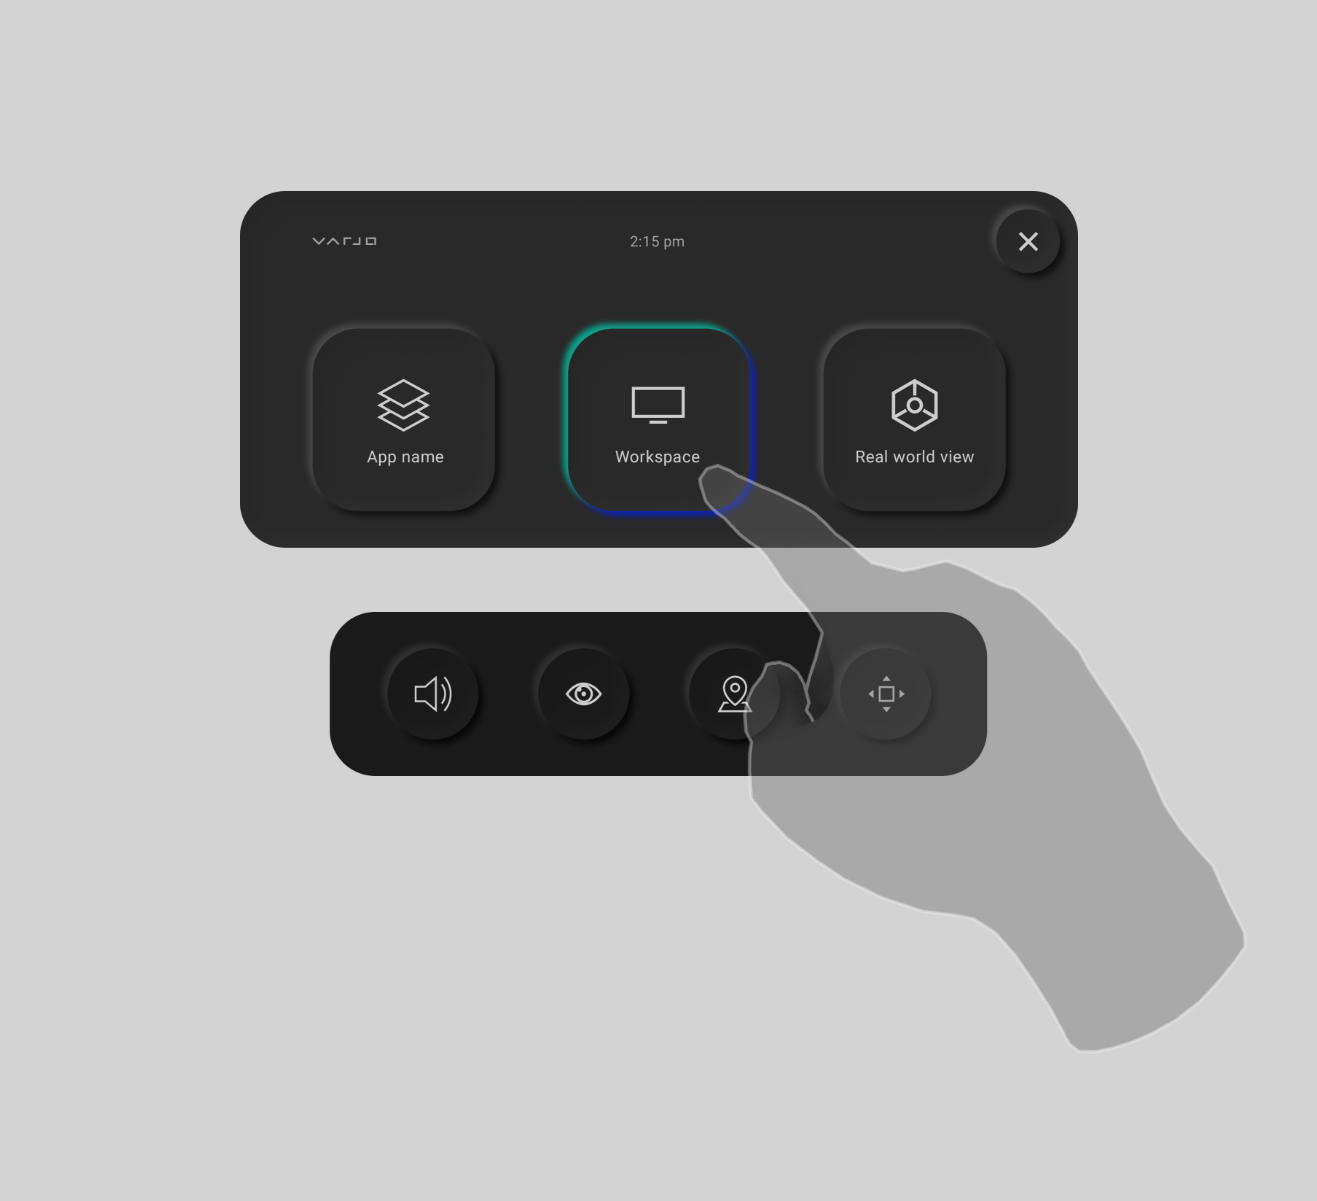
With XR-3 and VR-3, you can also use the Menu with your hands. Simply push the menu items with one or more fingers.
Using audio
Using the integrated speakers
XR-4
The XR-4 has integrated speakers. You can change your audio device in the Windows Sound settings.
Windows 11:
- Go to System > Sound.
- Under Output, click Choose where to play sound.
- Select Headphones (Varjo Headset Audio).
Windows 10:
- Go to Sound settings.
- Click the drop-down menu under Choose your output device.
- Select Headphones (Varjo Headset Audio).
Using the noise-cancelling microphone
XR-4
The XR-4 has an integrated noise-cancelling microphone. You can change your input device in the Windows Sound settings.
Windows 11:
- Go to System > Sound.
- Under Input, click Choose a device for speaking and recording.
- Select Varjo Headset Audio.
Windows 10:
- Go to Sound settings.
- Click the drop-down menu under Choose your input device.
- Select Varjo Headset Audio.
Using external headphones
All Varjo headsets are equipped with a 3.5 mm headphone connector. You can also pair, for example, Bluetooth headphones through your computer.
Using spatial audio
XR-4
XR-4 includes support for DTS® Headphone:X® spatial audio.
The DTS® Sound Unbound™ application is included in the Varjo Base installation package and is automatically installed to your computer when installing Varjo Base.
To use spatial audio, you will need to manually enable it in the Windows sound settings.
How to enable spatial audio in Windows 11:
- Make sure your headset is connected to your computer.
- Go to System > Sound.
- Under Output select Choose where to play sound.
- Select the audio device you are using.
- Open the drop-down menu under Spatial audio.
- Select DTS® Headphone:X®.
How to enable spatial audio in Windows 10:
- Make sure your headset is connected to your computer.
- Go to Sound settings.
- Navigate to Device properties under Output.
- Open the drop-down menu under Spatial sound.
- Select DTS® Headphone:X®.
Note: DTS® Headphone:X® spatial audio only works in applications that support 3D spatial audio.
For DTS patents, see http://patents.dts.com. Manufactured under license from DTS, Inc. (for companies headquartered in the U.S./Japan/Taiwan) or under license from DTS Licensing Limited (for all other companies). DTS, DTS:X, DTS Sound Unbound, Headphone:X, the DTS logo, and the DTS:X logo are registered trademarks or trademarks of DTS, Inc. in the United States and other countries. © 2021 DTS, Inc. ALL RIGHTS RESERVED