Connecting the 10m cable pair
XR-3 and VR-3
XR-3 and VR-3 come with a pair of 5 m (16 ft) cables that are used to connect the headset to your computer. You can replace the standard cable pair with a longer 10 m (33 ft) cable pair available in Varjo Store.
Only use Varjo-supplied cables to connect your headset. We cannot guarantee full functionality when using other cables.
Before you start, disconnect the headset from all other devices.
Overview

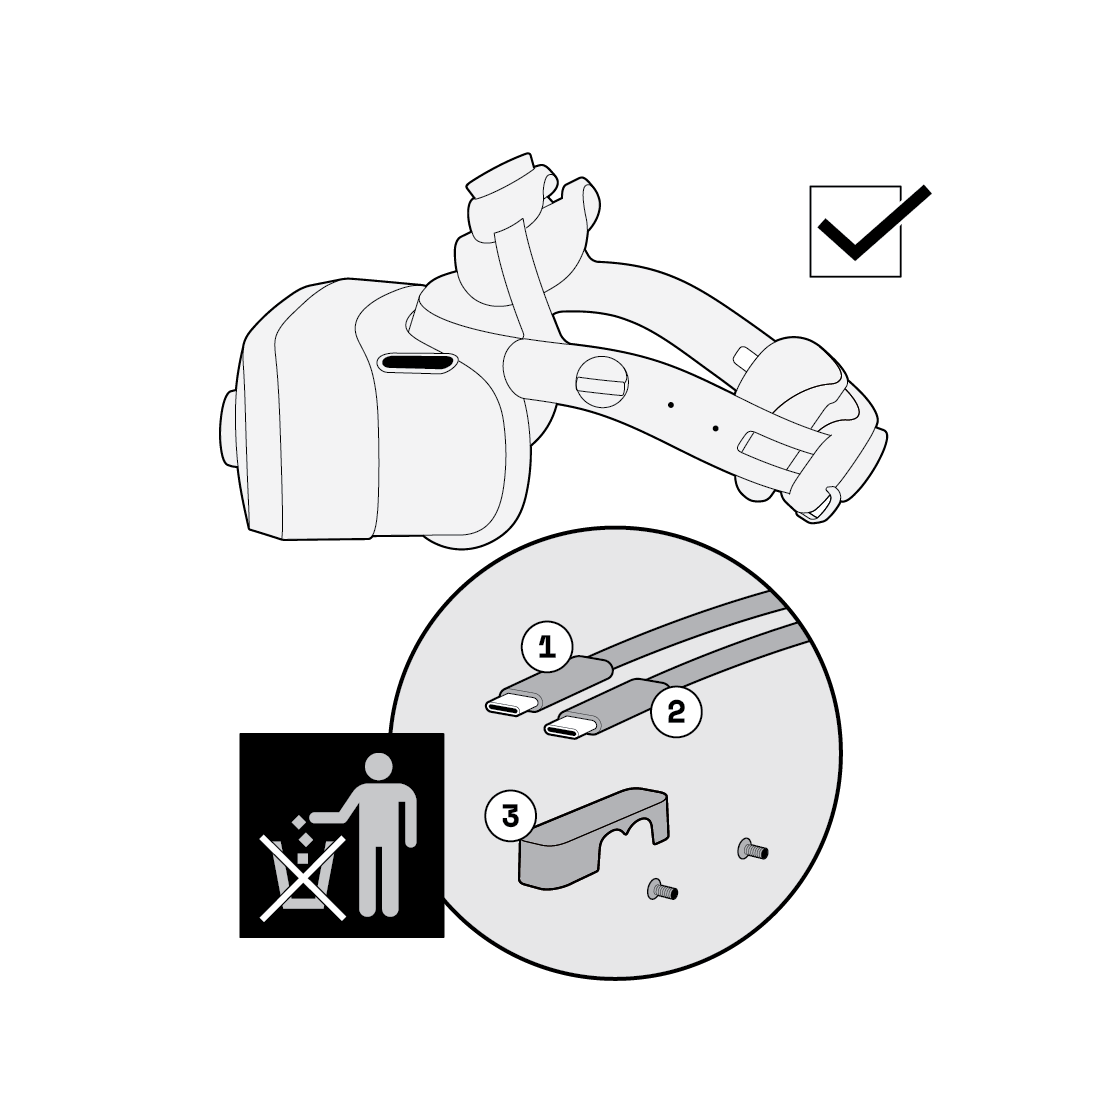
The standard cables (1, 2) are connected to two USB-C ports on the left side of the headset body and secured to the headband with a cable clamp (3).
Included with the 10m cable pair are the headset cables (4, 5), a compatible cable clamp (6), screws (7), cable clips (8), and a Torx T6 screwdriver.
Disconnecting the standard cable pair
Disconnect the standard cable pair from your headset as follows:
 |
Step 1.
Disconnect the headset cables from the USB-C ports on the left side of the headset body. |
 |
Step 2.
Release the cables from the cable holder at the back of the headband. |
 |
Step 3.
Unscrew the cable clamp from the headset body using the supplied Torx T6 screwdriver. The clamp is held in place by two screws located on the inside of the headband. |
 |
Step 4.
The cables are now disconnected. Store the cables, cable clamp, and screws for future use. |
Connecting the 10m cable pair
Connect the 10m cable pair to your headset as follows:
 |
Step 5.
Connect the two cables to the USB-C ports on the left side of the headset body. Both the cables and the ports on the headset are labeled (C) and (D). Make sure to connect each cable to the corresponding port. |
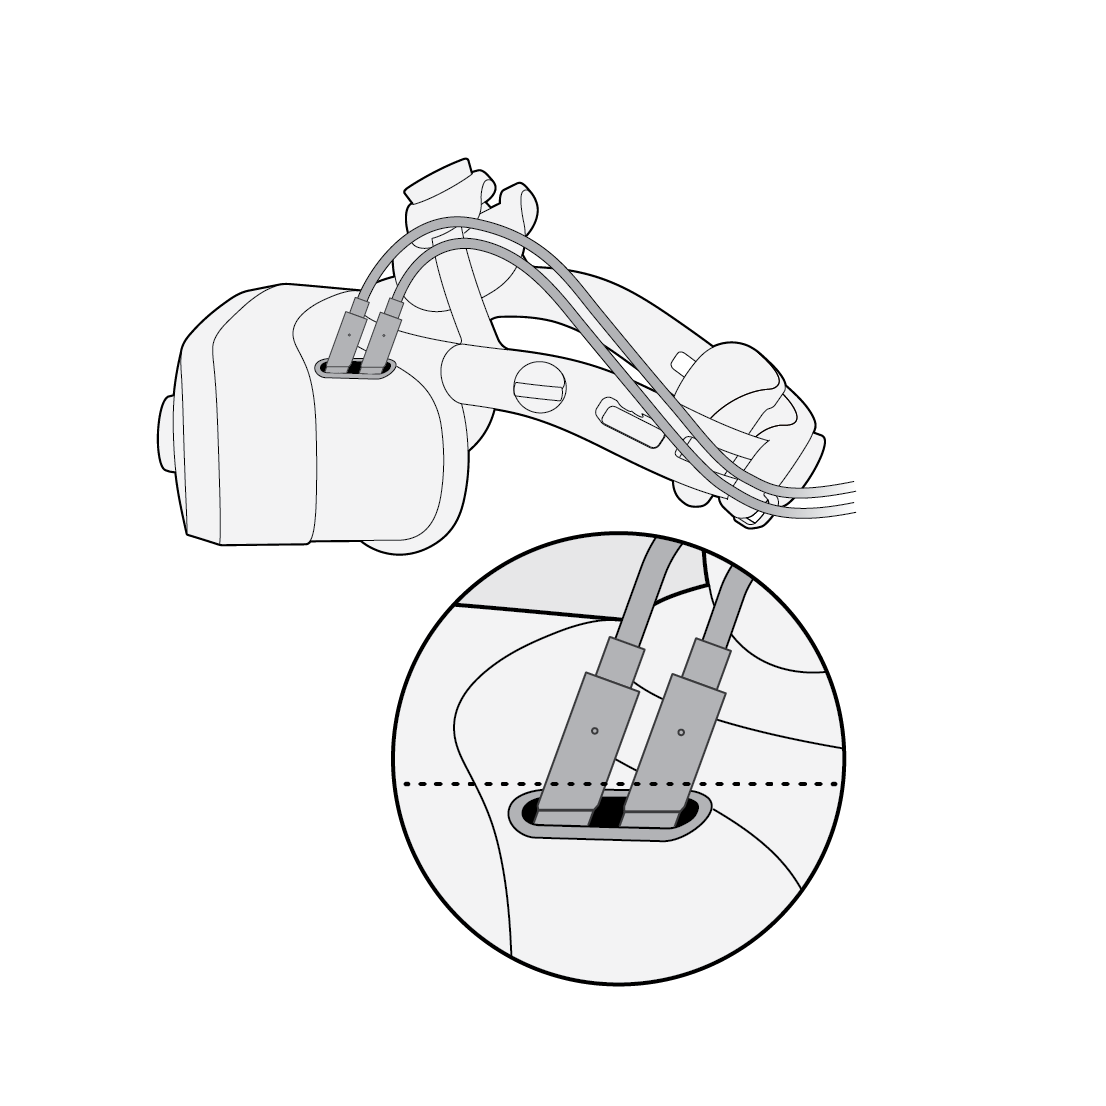 |
Step 6.
Make sure that the cables are correctly inserted into the two ports. Check that the notches on the cables line up with the rim of the headset body. |
 |
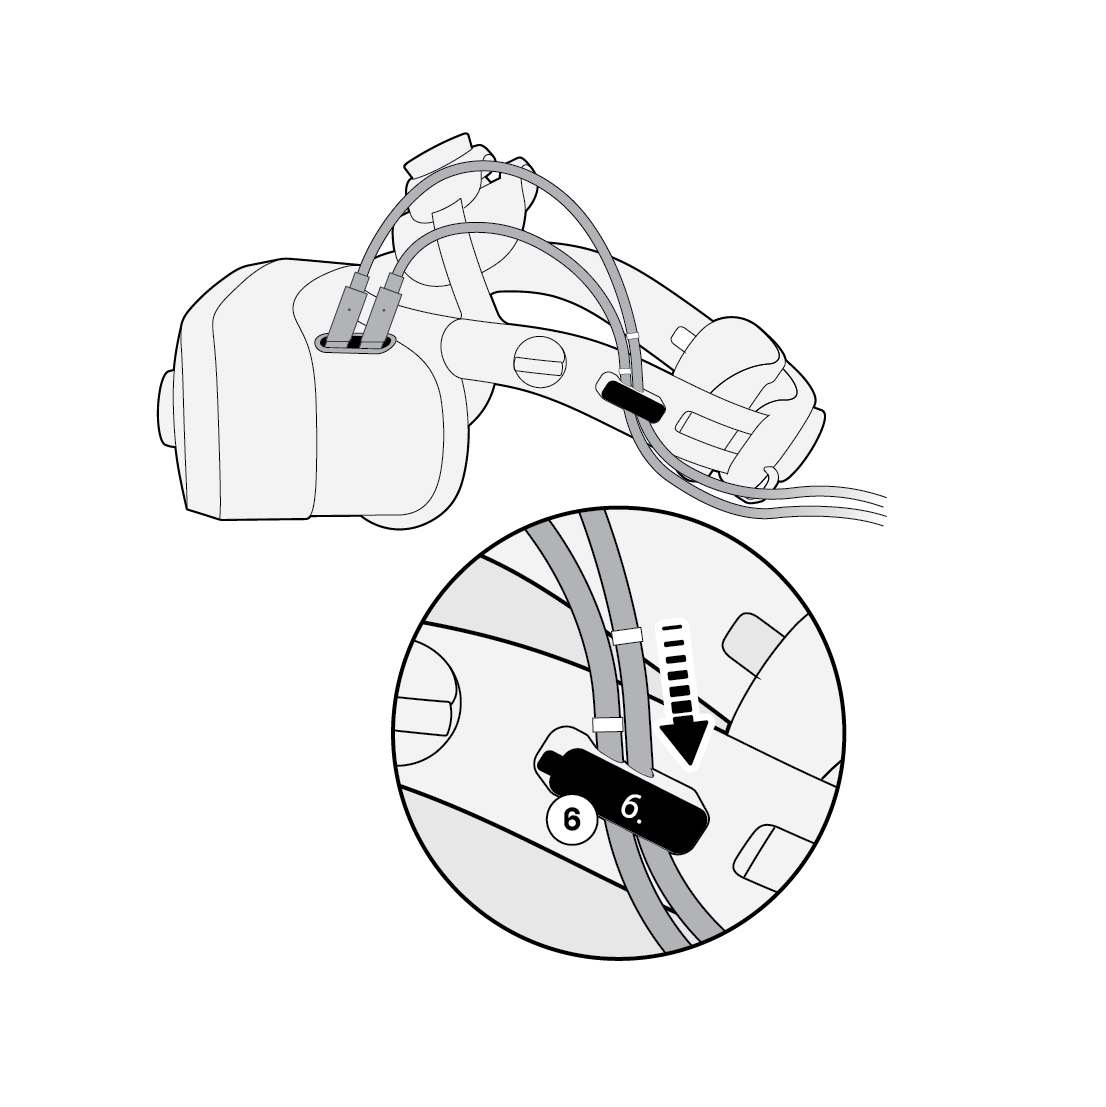
Step 7.
Position the cables into the cable clamp and push the clamp into place on the left side of the headband. Lightly tighten the two screws that hold the cable clamp in place using the supplied the Torx T6 screwdriver. Do not tighten the screws fully as you will need to adjust the positioning of the cables next. |
|
Step 8.
Adjust the cables so that the markings on the cables line up with the cable clamp. |
 |
Step 9.
Tighten the screws holding the cable clamp in place. Use a maximum of six full turns to tighten. Do not overtighten the screws. |
 |
Step 10.
Insert the cables into the cable holder at the back of the headband. |
 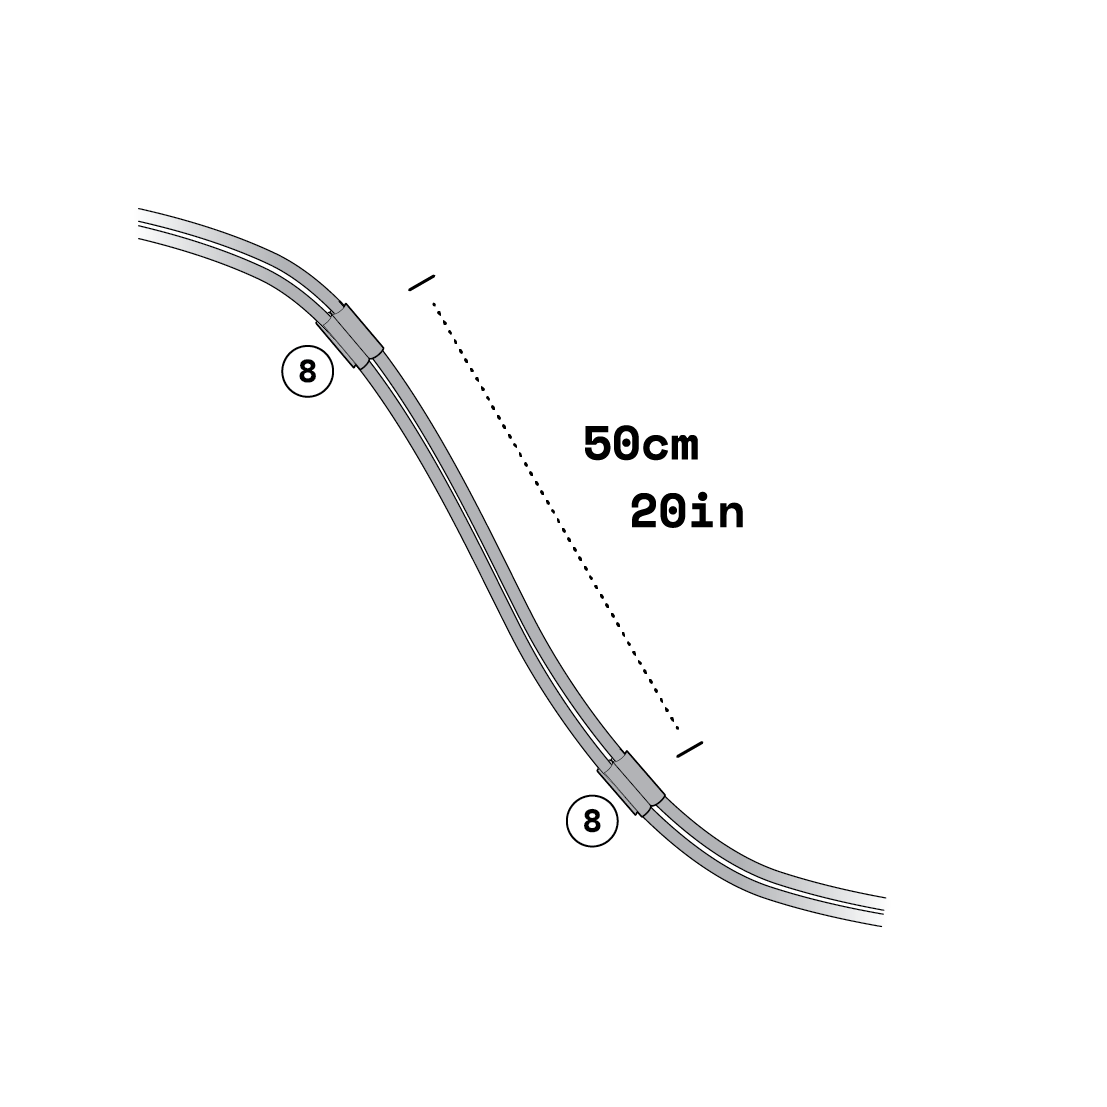 |
Step 11.
Tie the cables together along their length using the supplied cable clips. Leave a space of 50 cm (20 in) between clips. |
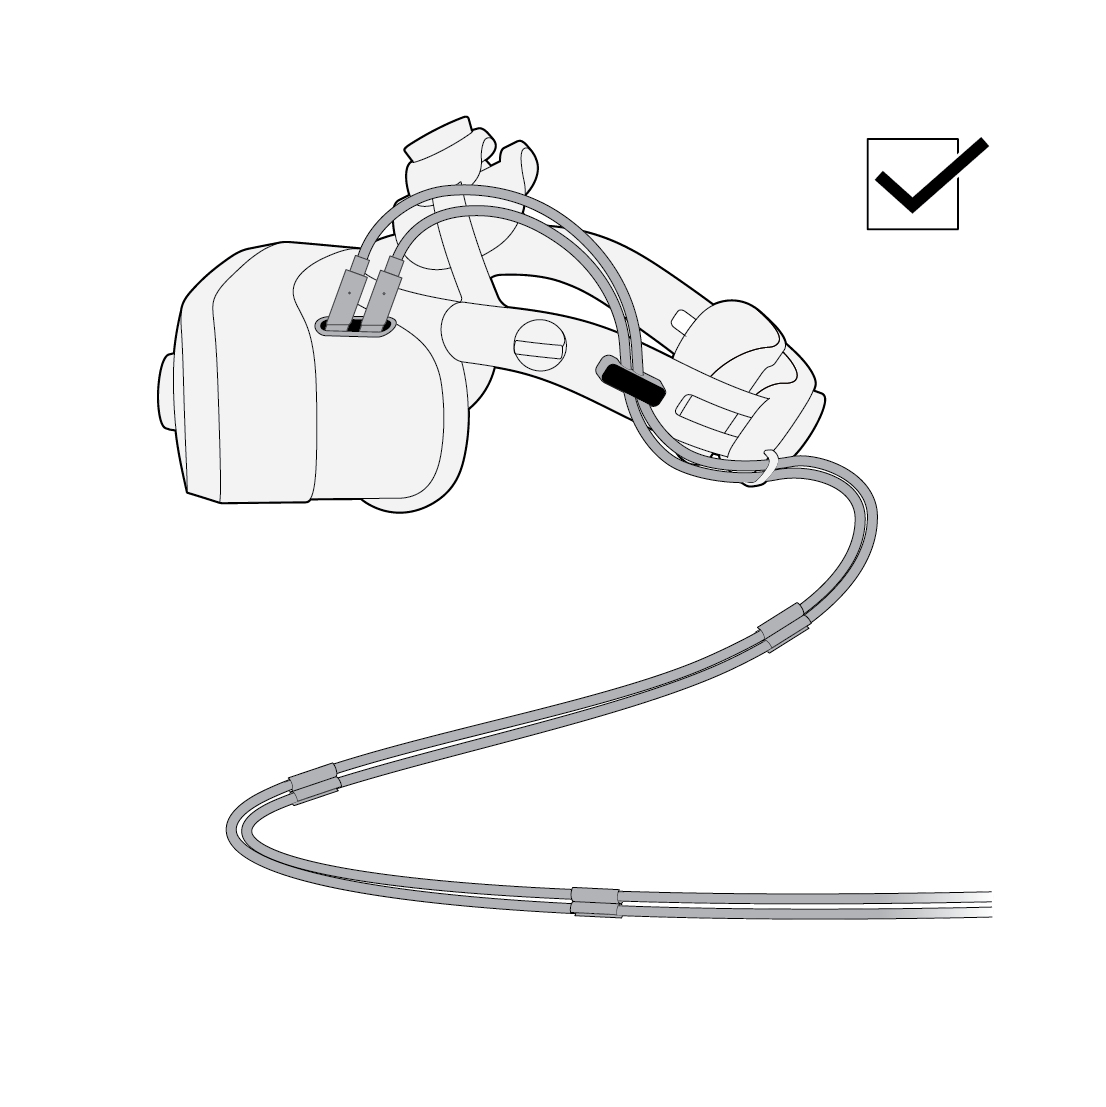 |
Step 12.
The cables are now connected and your headset is ready for use. |
