Fitting the headset
This page includes tips to help you find a comfortable fit while wearing your XR-3, VR-3, or Varjo Aero headset.
Putting on the headset
Adjust your headset when you put it on to find a comfortable fit and to get the best possible image quality.
Before you put on the headset, rotate both adjustment wheels counterclockwise to loosen the headband. Do not force the headset on if the headband is too tight. You can wear most eyeglasses with single-vision lenses when using the headset.
To put on the headset, place the front part on your face and pull the headband over the back of your head.
 |
 |
 |
When you put on the headset, adjust it to find the right fit for you:
 Rotate the back adjustment wheel to tighten the headband.
 Rotate the front adjustment wheel to move the headset up or down on your head. Support the headset body with one hand while adjusting.

 Use the side knobs on either side to adjust how the headset fits around your face.
The headset is correctly adjusted when it sits comfortably on your head, stays in place, and the image inside the headset is sharp.
Changing the face cushion

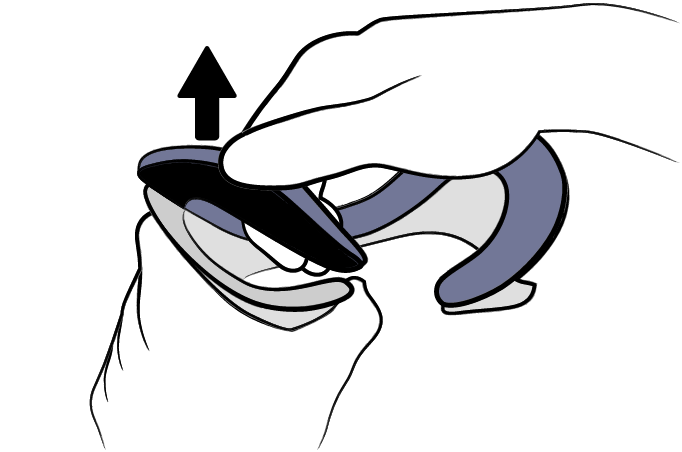
The face cushion is attached to the headset body with hook-and-loop strips and can be easily changed.
-
- Gently pull the cushion from either of the corners and lift it off.
- Attach a new cushion by starting from either of the corners and push it firmly into place.
- Make sure that there are no wrinkles in the cushion and that it entirely covers the hook-and-loop strips.
Note that face cushions used with other Varjo headset models are not compatible with XR-3, VR-3, and Aero. You can purchase additional cushions from Varjo.
